Diamond-edged grinding and cutting tool break strength


Solution
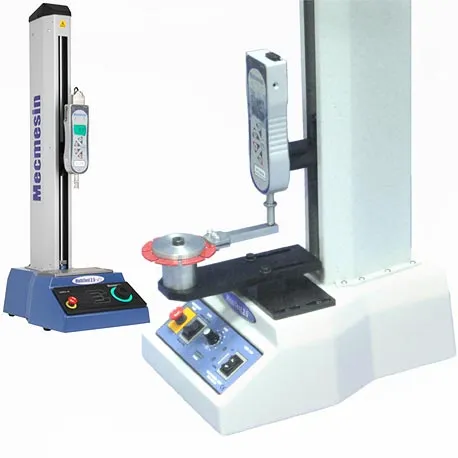
- Motorised test stand and digital force gauge
- Custom locating fixture for both cutting wheel variants
- Tooth clamping fixture
Benefits
- Universal fixture to locate different tool types
- Simple controls for quick, repeatable and error-free checks
Requirement
Diamond tools that enable highly precise and high-grade processing are used in various industries including automotive, IT and electronics. Grinding wheels and circular cutting blades with diamond or cubit boron nitride (cBN) edges make use of advanced materials technology to provide the optimum in performance vs tool life.
Typical blades for angle grinders and circular saws are ‘continuous-rim’ or ‘segmented-rim’ to which are fitted abrasives with varying profiles. For challenging applications, such as semiconductor wafers, super-fine diamond abrasives allow ultra-precision grinding; providing a much lower grinding force and longer continuous grinding without dressing when compared to resin bond wheels.
The cutting tips are typically brazed to the main disc.If a bubble containing air is created during this fusion process it can weaken the joint. Making sure that the cutting rims of grinding blades and saws are strong enough to withstand the demands of intense use, is a key quality-control requirement for their manufacturers.
Solution
Leading producers in Korea, Japan and Luxembourg have turned to Mecmesin for an affordable, reliable tensile/compression tester to check the rim strength of their blades according to different methods.
For testing in tensile shear, a test procedure was established to secure each circular blade at its centre within a universal holder, ensuring that various diameter blades are positioned at exactly 100 mm from the loading axis. A gripping clamp of 75 mm wide was developed to hold onto the rim of both types of blade. The motorised test stand equipped with an Advanced Force Gauge applied a tensile flexural force at a constant rate of extension (CRE) to ensure optimum repeatability of results. The MultiTest’s ‘cycle-between’ feature enabled a repeated number of load applications to be applied before the test specimen is checked for fracture damage. Should failure occur during the cyclic phase, the maximum load to break the rim off the blade is captured by the force gauge with results being downloaded via RS232 to a PC for subsequent batch-analysis.
For testing in compressive shear, a test procedure was established to slowly apply compressive load to shear off the tip at forces around 2000N.
This simple bench-top tester proved ideal for use in both the production area and in the QC laboratory for operators working across 2 shifts per day.
Test equipment
- MultiTest 2.5-dV motorised test stand
- AFG 2500 N Advanced Digital Force Gauge, with supplied extension rod / compression probe
- Adjustable clamping cantilever fixture with flat landing face for compression probe
- Special lower fixture for locating and changing the wheel specimen


